Saturday, July 26, 2014

Potato and Kale Soup aka Dairy Free Zuppa Toscana

Ready yourself for a dirty word. Got your ears covered? Wincing yet? Kale. Yep, this nutritional powerhouse takes center stage for this recipe. Don't leave yet! This soup is both nutritious AND delicious, not to mention hearty! Actually, it reminds me of Olive Garden's Zuppa Toscana, which happens to be what I got at said restaurant every single time (now with Ruby's dairy allergy, Olive Garden is sadly a no-go). Needless to say, I was pumped to change up a few recipes to come up with this yummy one!


If you still doubt this soup despite my promises of deliciousness, test it out for the health benefits and because it is a great soup to share with your baby, minus the sausage. I'm not a nutritionist, so I'll let "The Cleaner Plate Club" by Beth Bader and Ali Benjamin speak for me. They explain that kale is high in beta-carotene, vitamins A, B6, K, and C, fiber, folic acid, manganese, potassium, and absorbable calcium. It also offers sulphur-containing phytonutrients. All of these together means a loewr risk of cancer (including breast and ovarian), healthy bones, boosted vision, strong immune system, and healthy lungs, joints, and hearts. Phew! Like I said, nutritional powerhouse!

Anywho, I hope you're convinced to at least try this recipe, as I promise it makes kale taste better than any of the kale chips I've ever tasted. Ruby and Sam both adored it, and Sam was shocked that he was eating kale. I cheated and told him after he started ;)

Ingredients:

1 tbsp. olive oil
1 pound sweet Italian sausage (no casings)
2 garlic cloves, chopped
8 cups chicken broth (homemade bone broth is best)
2 pounds potatoes, chopped into eighths
8 stems kale, veined and chopped
1 tbsp. Italian seasoning

Directions:

Heat the oil in a skillet over medium heat and add the sausage. When the sausage starts to brown, add the garlic and saute for an additional 1-2 minutes. Set aside the mixture.


Pull out a large pot or stockpot and add the broth and potatoes. Bring them to a boil, then turn down the heat and let bubble for 20 minutes.


Add in the kale, seasoning, and sausage mixture and bring back to a boil.


Reduce heat and simmer for an additional 15 minutes.


Simple, tasty, and highly nutritious! To feed to Ruby, I strained the soup and removed the sausage pieces.


Tuesday, July 22, 2014

Baked Chickpea Fritters

Ok, like I always say, full disclosure here! This recipe didn't start out as "baked" chickpea fritters. In fact, I was super excited to fry up these bad boys. However, I am obviously not a fancy chef with tons of experience. Despite being sure to make the chickpeas super dry before blending, and despite adjusting oil temperatures, every time I tried to put a fritter in the pan, it completely disintegrated. I mean, it was so gone that I thought I was losing it when I stuck it in the oil, turned around to give Ruby more black beans, and turned back to see it was gone!
So, I did what all mamas have to do when they still need dinner on the table. I got a little resourceful and decided to go with the healthier baking option ;) What you are about to read is a recipe for really delicious food, but it may not be the most tried and true method. If  you feel more comfortable frying your fritters, whip out that olive oil and enjoy!
Also, I wanted to make a plug for adding some yummy pita and hummus to the menu since they go so well together! If you need the recipe for both, head to http://giveagirlakitchen.blogspot.com/2014/07/homemade-pita-and-hummus.html.

Ingredients:
15 oz can of chickpeas, drained, rinsed, and dried
2 tsp. cumin
1 tsp. salt
1 tsp. baking powder
2 tbsp. scallions, chopped
1 tbsp. parsley
2 tbsp. cilantro, minced
Olive oil

Directions:
This should literally be one of the easiest recipes you've made in a loooong time. Should be. So hopefully your food processor works better than mine does, because it wasn't... Anywho, make sure your chickpeas are very dry and drop them into the food processor. Blend them until they become a smooth paste. Add in the rest of the ingredients (minus the olive oil), blending between each ingredient. You should be left with a nice, thick paste of yummy smelling awesomeness. It's going to be hard, but leave it to firm up for an hour.


 When you've done your time, preheat your oven to 350 degrees. Roll the paste into small balls the size of a heaping tablespoon. Roll each ball in a little bit of olive oil so that they are well covered and place them on a sheet of wax paper or plastic wrap.


Cover the balls with another sheet, and press them each with a spoon to flatten into little patties. 


If you're going to fry them, good luck! But feel free to proceed to baking.


Place the patties on a baking sheet and bake for 7 minutes. Take out them out, flip them, and return to the oven for 3 minutes. You're done!


Your fritters should come out lightly browned and completely delicious, especially when you pair them with homemade pita and hummus!


Ruby says she will show you her food, but she is not going to share!

Monday, July 21, 2014

Homemade Pita and Hummus


I LOVE pita and hummus! I could eat it all the time for a snack or as a meal with a little something extra (I'll tell my chickpea fritter story soon). However, they're typically pretty pricey at the store if you get the good stuff. Lo and behold, they're both super easy to make! My husband thought he'd won the jackpot when I told him he could eat as much as he liked because they're both easy and inexpensive to make.

Pita Bread Ingredients (makes 6):
1 1/3 cups white/all-purpose flour
2/3 cup wheat flour
1 tsp. brown sugar
1 tsp. salt
1 1/2 tsp. yeast
3/4 cup water
1 tbsp. olive oil

Directions:
If you have a bread machine, pull it out! It makes making this pita almost mindless. Put all the ingredients into the machine following the order your bread machine dictates. I, however, have lost the manual to my bread machine, so I just add the dry ingredients first followed by the wet ones. Turn the machine on and start the dough cycle. Voila! The machine will take care of the hard work.
If you don't, I'm sorry, but it's still possible! Warm the water and put it into a large mixing bowl. Add the yeast and let it sit for 5 minutes until it is dissolved. Add in the whole wheat flour and 1 cup of the white flour, saving 1/3 cup of white flour for kneading. Add in the rest of the ingredients and stir until a dough is formed. Lightly flour a surface and get to kneading! Slowly add the rest of the flour in and knead for 5-7 minutes. Put the dough back into the bowl, cover, and let rise in a warm place for 1-2 hours.
Ok, now the bread machine users and the by-hand folks are back on the same track! Punch down the dough and break into 6 equal balls. Flatten them a little and let them rest for 10 minutes so that they don't bounce right back when trying to roll it out. When your dough is done resting (my, it must be nice to take a break!), roll the balls into 6-inch circles. Place the circles on a pan sprinkled with oats (you can use cornmeal, but we avoid corn) and cover them with a slightly damp towel or paper towel. Let them rise for 30 minutes and preheat your oven to 475 degrees. Now would be a good time to get to work on the hummus!


Looking pretty all rolled out! Nothing like the feeling of kneading bread dough.

When the 30 minutes are up, bake for about 6 minutes, or until the top is lightly browned. Take the pita out and flip them carefully. Return to the oven and bake for 3 more minutes until the other side is lightly browned. You've got pita!


Before we get started with the hummus, I have an honest question. Who else didn't realize that chickpeas and garbanzo beans were the same thing?! The first time I needed them for a recipe, I literally spent 30 minutes at Sprouts one day searching with an employee for a can of chickpeas. Thankfully she went to ask a manager if they had any in the back, and the manager explained that we could find chickpeas in the can of garbanzo beans. Boy did I feel like a dork! Ha! 

Hummus Ingredients:
1 can chickpeas (15 ounces)
1/4 cup tahini (sesame seed butter)
Half a lemon, juiced (2 tbsp)
2 cloves garlic, minced
2-3 tbsp olive oil
Cherry tomatoes (optional)

Directions:
Drain and rinse the chickpeas in the sink to get rid of excess salt and the watery gunk. Then decide if you want super creamy hummus or just ok hummus. If you're going for the super creamy, proceed to take the skin off of every chickpea. If you have the time for that, more power to you! However, my baby was crawling up my legs at this point, so I settled.
Anywho, add all of the ingredients minus the olive oil into a food processor or blender. Blend the ingredients well. add the olive oil and pulse until you have the desired consistency. Refrigerate the hummus for about 30 minutes to firm up. Cut up the cherry tomatoes if you wish, because they look pretty and add some good nutrition!

Admittedly, the hummus didn't look super appetizing at this point. But then...

 Suggested serving option. Those little patties in the front are baked chickpea fritters. I'll get to those soon! Delicious!
Ruby chowing down for lunch. She was a big fan!

Friday, July 18, 2014

Lemon Blueberry Breakfast Bread


Now that blueberries are in abundance at the grocery store, this recipe has become one of our family favorites! I love when I'm able to convert a recipe into a dairy-free, whole wheat tasty treat! One super easy fix for recipes containing dairy is swapping out butter for Earth Balance Natural Buttery Spread. We use the soy free version made from olive oil because Ruby has the double whammy of being allergic to dairy and soy. For the same reasons, we also use almond milk instead of cow or soy milk. If you have no allergy issues, feel free to use the real deal!

Life saver!

Now that the Rubita is eating what we eat, I like to make food that she can have at least bits of. We don't feel comfortable introducing her to sugar yet, so I usually take the bullet and giver her my blueberries while we're eating the treat :) 

Ingredients:
1/3 cup butter/Earth Balance, melted
1 cup brown sugar
1 lemon, juiced (about 3 tablespoons)
2 eggs
1 1/2 cups whole wheat flour
1 tsp. baking powder
1 tsp. salt
1/2 cup almond milk
Zest from 1 lemon (about 1 tablespoon)
1 cup fresh blueberries

Beautiful, aren't they?

Directions:
Preheat the oven to 350 degrees. Grease a bread pan, 8x4 inch loaf pan, which coconut oil. You can use other oils or grease, but coconut oil has so many health benefits that I love to use it whenever possible! (More on that in a later blog post).

I like to get the organic version at Trader Joe's.

In a medium mixing bowl, add the butter, sugar, lemon juice, and eggs. Beat until well combined. Add half of the flour and beat until absorbed. Next, mix in the milk. Beat in the rest of the flour, baking powder, and salt. This process helps ensure that everything is well mixed and keeps your shirt from getting floured! Finish off by folding in the blueberries and lemon zest. Pour the mixture into your prepared pan.

Looking good!

Bake in your preheated oven for an hour. Check with a toothpick to make sure it is cooked through; if it isn't, add another 10 minutes to your timer. Let cool for 15 minutes and serve warm!


Like I said, Ruby only eats the baked blueberries, but she starts giggling with excitement when I cut us a slice! She also decided to have some egg, Go Baby Pancakes, and celery for her lunch. She has an eclectic taste, hehe :)


Thursday, July 17, 2014

Old Clothes/Bubbles and Squeak

Ok, here's the perfect dinner if you're trying to get your kiddos interested in eating their veggies! Both names for this meal, Old Clothes and Bubbles and Squeak, are likely to bring on the giggles and curiosity. It's a simple, quick, and (my favorite!) cheap dinner made with white potatoes, brussel sprouts, tomatoes, bacon, garlic, and olive oil. It can easily be made into a vegetarian recipe by replacing the bacon with eggs, but I just love the taste of bacon and brussel sprouts!

Another thing I love about this recipe is its versatility, which is great when you're trying to eat more seasonally. If you don't like brussel sprouts, you could use other greens like cabbage or turnip greens. If you choose not to eat bacon for whatever reason, again you can substitute with eggs, turkey bacon, leftover ham, etc. If you do choose to substitute bacon for something else, you may want to consider adding some salt for flavor. Anywho, below is the final product!


As described, this recipe will serve about 2 adults and 2 children. Sam likes to take the leftovers for lunch the next day. So let's get started!

Ingredients:
6 medium potatoes, peeled and chopped
2 handfuls of brussel sprout leaves (or other greens)
2 slices of bacon, chopped
2 garlic cloves, skinned and slivered
2-4 tablespoons of olive oil
1/2 pint of cherry tomatoes, halved (feel free to add more, but we didn't do a ton because only Sam and Ruby will eat them)


Hint: I like to use as much of my food as possible to reduce waste and save money, so instead of throwing out the denser, less leafy "heart" of the brussel sprouts, I save them to saute later with lemon and garlic for a snack for Ruby.

Directions:
Pull out a good sized pot and fill it with a generous amount of water, bringing it to a boil. While you wait for your water to boil, peel and chop the potatoes and pull the darker, bigger leaves off of the brussel sprouts. Add in the potatoes once the water is boiling. Return to a boil and cook the potatoes for about 15 minutes. During this time, cut the tomatoes into halves and chop the raw bacon and garlic cloves into thin slivers. Pull out a large skillet, add the olive oil, and heat it on medium-high. 


Your potatoes should have been cooking for about 15 minutes now, so add your brussel sprouts to the top of the pot and continue boiling together for 5 minutes. Start frying the bacon and add the garlic after it has cooked for 3 minutes.


Strain the vegetables, then add to the bacon and garlic. Be careful, the hot oil may pop! Fry together until the veggies get a nice, crusty edge and start browning a little. This may take about 10 minutes. Finally, make room for the tomatoes! Add them in, and fry them up for about 5 minutes until the skins become slightly browned.                  


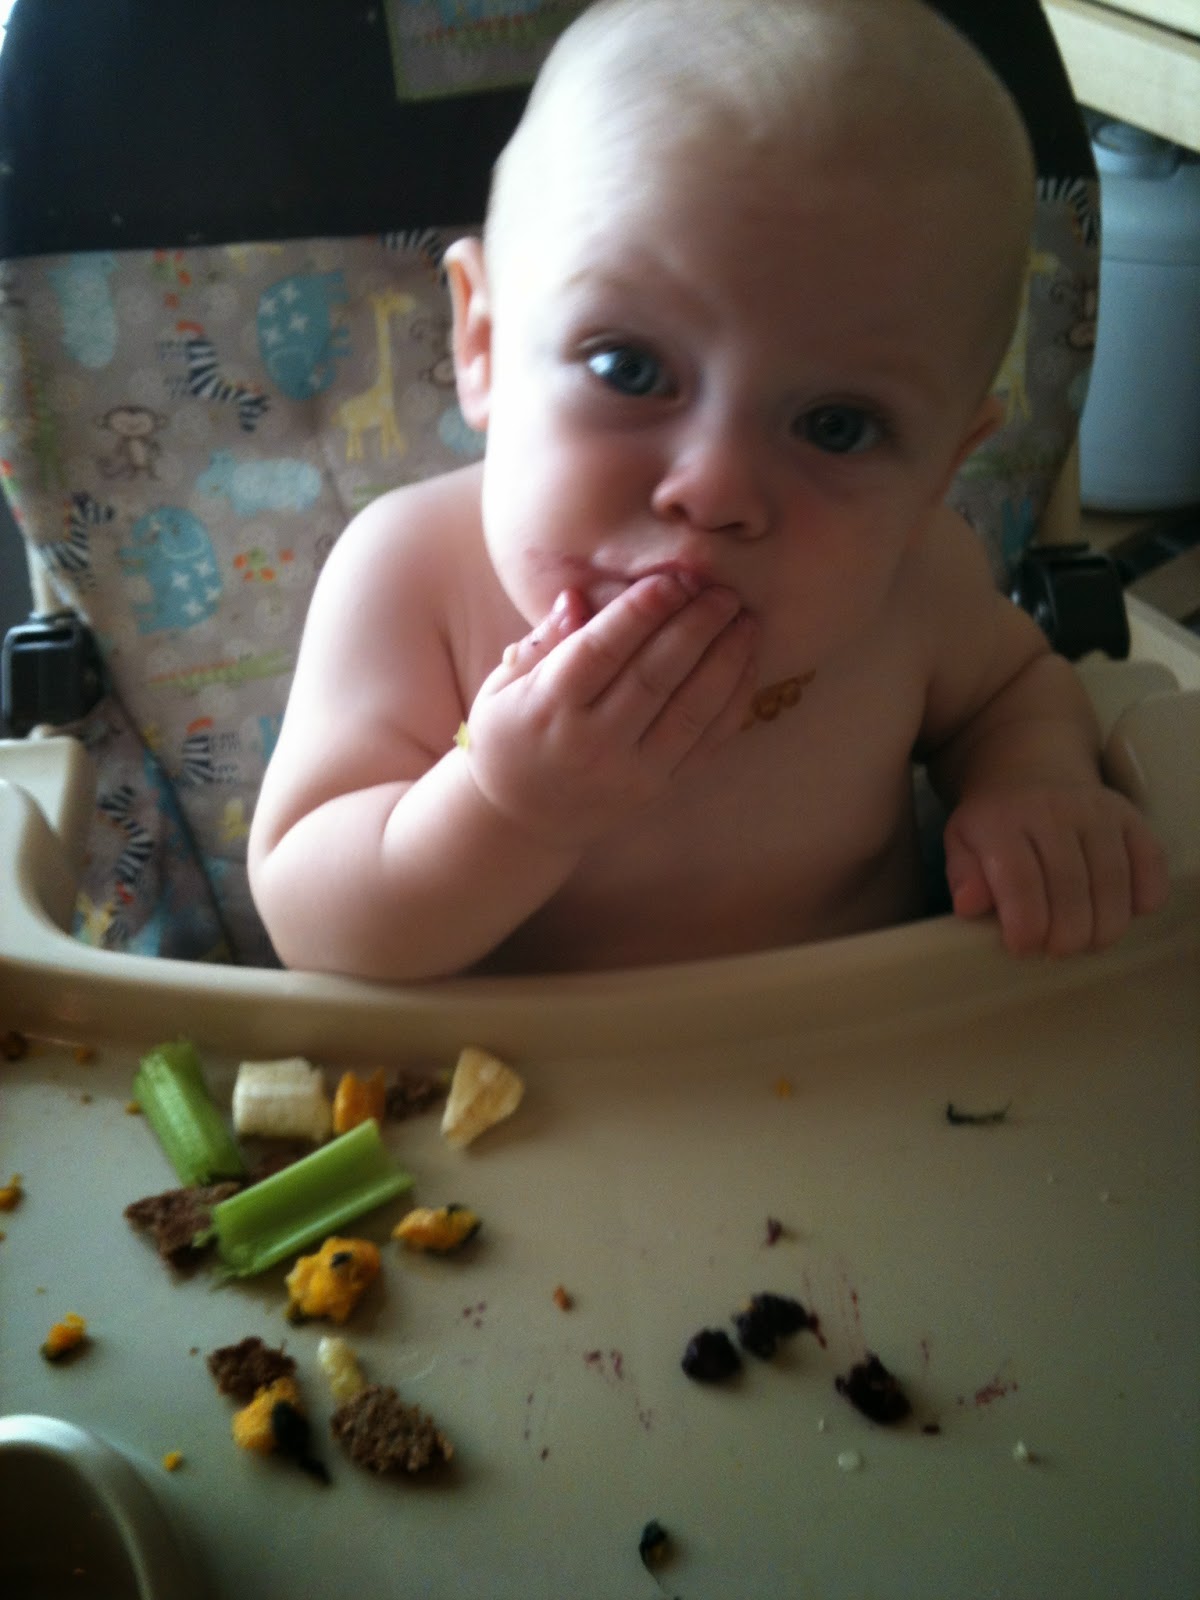
The finished dish really is beautiful, colorful, and tastes awesome! At about 9 months or whenever you get your doctor's approval, babies can start eating meat. However, we've decided to hold off for longer for a variety of reasons, but that's for another blog. For Ruby's meal, I just picked out the bacon bits. If she gets a little, no biggie! Sam's reaction, "Yum! Mama really is the best cook!" *blush* Ruby: She downed everything, as usual, and seemed to become particularly excited about the tomatoes (she gets that from her dad...). She would have eaten more, but daddy wanted some leftovers for lunch, so we gave her some leftover egg and spinach omelet and mango chunks.


Full disclosure: That neat little orange bowl did not last for long. About five seconds after I snapped this picture, she tried to pour all the contents into her lap. It didn't look so pretty all spread out on her high chair ;)

I hope you enjoy your Old Clothes or Bubbles and Squeak! Have another tasty variation? Let me know!

Tuesday, July 15, 2014

Soupe au Pistou aka Bean Soup with Pesto

Let's get this blog rolling! Tonight I tried out and adjusted a recipe I found in the "Food Adventures" cookbook written by Elisabeth Luard and Frances Boswell. This is a great book full of recipes aimed at introducing your young child (and yourself!) to foods from around the world. Soupe au pistou is a bean soup from Provence. Sam, the hubby, really enjoyed the heartiness of the soup and the rich flavor. Ruby, the babes, chowed down, finished her portion, and demanded seconds! I was happy that I got to use some basil from my plant (picked it up for $3 at Sprouts, a gift that keeps giving!).


It's a great Vegan recipe with lots of legumes, veggies, and did I mention flavor? I recommend serving it with some hot homemade whole wheat bread (if it was baked with honey, it is not safe for babies under the age of 12 months due to botulism concerns).

Soup Ingredients:

1 cup of dried white navy beans
2 stalks of celery, finely chopped
2 shallots (green onions), finely chopped
4 peppercorns, crushed
3 whole garlic cloves
2 russet potatoes, peeled and chopped into small chunks

Pistou (Pesto) Ingredients

2 garlic cloves, skinned and chopped
4-5 heaping tablespoons of fresh basil leaves
1 slice of old bread
dash of salt
2/3 cup olive oil

I recommend you start the night before by soaking your navy beans to make them easy the day of. However, if you're like me, often you forget and have to do the quick boil method. For the quick boil method, add about 4 cups of water to a good sized pot and bring it to a boil. Slowly add in the beans so as not to interrupt the boil. Let boil for about 5 minutes, then drain and rinse the beans. If you soaked, good for you! Start here: Put your navy beans into a pot with the celery, shallots, peppercorns, and garlic. Cover them generously with water, and bring to a rolling boil. Reduce heat, cover, and simmer for about an hour. Feel free to add more water if necessary. Check your beans. If they are still hard, cook longer in 10 minute intervals. Once your beans are soft, add in the chopped potatoes and gently boil for 30 minutes. When finished, add salt and pepper to taste, or not!


When the soup is almost finished, start working on the pesto. Add the garlic, basil, bread, and salt to a food processor or blender. Blend to a puree, then slooowwwly add the oil, as if your were making mayonnaise. The pesto should be thick when finished, but if it's a little loose, no worries! You're adding it to a soup ;)
Serve the soup in bowls with the pesto in it's own bowl so that everyone can add in however much they desire. Enjoy!


 Ruby's before and after shots :)


I'm Baaack!

Wow! It's been a few years since I've blogged, and a lot has changed! I pretty much stopped cooking in general when I became pregnant with our wonderful daughter, Ruby. She is now 9 months old and we're completely in love :) When I was pregnant, I had a really hard time eating anything in general with smells as mild as oatmeal making me run to the bathroom. I was pretty bummed that I didn't have any food cravings or the desire to eat whatever I wanted, but instead had a million food aversions.
Now, I'm back to being a stay-at-home mama to a daughter with allergies to all dairy and soy. While it's been an adventure cutting out both from my diet (I nurse), it has definitely been a blessing to learn about how to cook and eat whole, real foods! I thought it would be fun to get back to the old blog and share the hits and duds along the way.
So basically, I will be sharing recipes of interesting, whole food meals that I feel comfortable sharing with my daughter, both from an allergy and health perspective. My goal is to teach my daughter to love food with a variety of flavors and textures at a young age so that she won't reject them altogether as a toddler. In addition, I hope to get over my own veggie phobias and embrace foods from other cultures while on a budget! By the way, my shopping budget has increased from $20/week to $50/week due to an additional mouth to feed and a desire to avoid processed food while shopping more seasonally, locally, and healthily. I typically do 95% of my shopping at Sprouts and 5% at Trader Joe's.
I look forward to getting back to the world of blogging and hope to hear some great tips and feedback from you!